Key takeaways
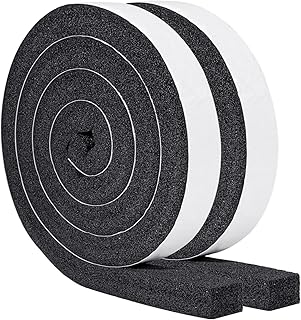
- Compression gaps (1/2″–1″): The space between sash rails, or between the chassis and the sill, closes under pressure. Use a closed-cell foam strip like the High Density Foam Tape AC Window Seal or the Yotache Window Seal Kit — both are 1″x1″, which is the workhorse dimension for window AC work.
- Flat seams and joints: Where two rigid surfaces meet with no compression, foam won’t help. A wide sealing tape such as the SWRT 20 Mil Window Weather Sealing Tape spans the seam and adheres to both sides.
- The accordion side panels: Factory panels are thin plastic with almost no R-value. Rigid inserts like the 2 Pack Window Air Conditioner Side Panels replace or back them with a 1″-thick insulated board.
- Portable units: If you’re venting a hose rather than mounting a chassis, the HOOMEE Universal Window Seal is the right category of product — a zippered fabric panel, not tape.
What's inside
A window air conditioner is only as good as the seal around it. I’ve spent years working with people whose sleep was wrecked by a bedroom that never quite got cool enough, or by the low mechanical drone that seemed to seep in from outside. In a striking number of those cases, the unit itself was fine. The gaps around it were the problem — thin channels of unconditioned air, street noise, and (in late summer) insects, running straight into the room where they were trying to rest.
Sealing those gaps is one of the highest-return hours you can spend on your home. Done properly, it lowers your bedroom’s overnight temperature swing, reduces the compressor cycling that tends to wake light sleepers, cuts your cooling bill, and keeps humid outdoor air from condensing on cool interior surfaces. Below, I’ll walk you through how to assess your installation, what materials actually hold up, the order of operations that produces an airtight result, and the mistakes that quietly undo good work. A few products I keep recommending are collected at the top.
As an Amazon Associate we earn from qualifying purchases.




Start by Finding Where Air Is Actually Moving
Before you buy anything, diagnose. Wait until the outdoor temperature differs sharply from indoors, turn the AC off, and run the back of your hand slowly around the entire perimeter of the unit — along the accordion side panels, the top of the lower sash, the seam where the upper and lower sashes overlap, and the underside of the chassis. Skin is remarkably good at detecting moving air. For a more visual check, hold a lit incense stick near each seam and watch which way the smoke drifts. Note every leak with a pencil mark on the frame. Most installations have four or five, and the sash-overlap gap at the middle of the window is the one people miss most often, because it’s above eye level and invisible.
Match the Material to the Gap
Different gaps want different products, and this is where most DIY sealing goes wrong. A quick framework:
- Compression gaps (1/2″–1″): The space between sash rails, or between the chassis and the sill, closes under pressure. Use a closed-cell foam strip like the High Density Foam Tape AC Window Seal or the Yotache Window Seal Kit — both are 1″x1″, which is the workhorse dimension for window AC work.
- Flat seams and joints: Where two rigid surfaces meet with no compression, foam won’t help. A wide sealing tape such as the SWRT 20 Mil Window Weather Sealing Tape spans the seam and adheres to both sides.
- The accordion side panels: Factory panels are thin plastic with almost no R-value. Rigid inserts like the 2 Pack Window Air Conditioner Side Panels replace or back them with a 1″-thick insulated board.
- Portable units: If you’re venting a hose rather than mounting a chassis, the HOOMEE Universal Window Seal is the right category of product — a zippered fabric panel, not tape.
Work From the Inside Out, Bottom Up
Sequence matters. Begin with the largest structural gaps — the side panels — and finish with fine tape work, because adding a rigid panel shifts the geometry of everything around it. Clean each surface with isopropyl alcohol and let it dry fully; adhesive foam fails on dusty aluminum, not because the foam is cheap but because nothing was there for it to grip. Apply foam to the stationary surface rather than the moving sash where you can, so opening the window later doesn’t peel your work off. Compress foam only to about two-thirds of its thickness when you close the sash; fully crushed foam loses its resilience within a season and stops rebounding.
Don’t Overlook Drainage and Tilt
An airtight seal that traps water is worse than a small leak. Window units are designed to sit with a slight downward pitch toward the outside — typically about a quarter inch — so condensate drains away from the building. Before you commit adhesive anywhere, put a level on the top of the chassis and confirm the tilt. Never seal the drain pan openings or the weep slots on the outdoor side of the cabinet. If you find standing water in the pan after a humid week, the problem is pitch, not sealing, and no amount of tape will fix it.
Consider Whether the Unit Itself Is the Bottleneck
Sealing raises the effective capacity of whatever you own, but it can’t compensate for a unit that’s badly matched to the room. An undersized AC runs continuously and never dehumidifies; an oversized one short-cycles, which is both noisier and worse for humidity control. If your existing unit is more than a decade old or clearly wrong for the space, replacing it alongside the seal work is the better investment — something like the BLACK+DECKER 12,000 BTU Window Air Conditioner covers rooms up to roughly 550 square feet and includes a fan-only mode that’s useful on mild nights when you want air movement without cooling.
Tips
- Buy roughly 30% more foam than your measurements suggest. Corners consume more than you’d expect, and you’ll want offcuts for touch-ups in August.
- Install a secondary lock or a cut length of dowel in the upper sash channel. A sealed unit is a sealed unit; it shouldn’t also be an unlocked window.
- Photograph your finished installation. Next spring, reinstallation takes fifteen minutes instead of an hour of re-solving the same puzzle.
- Add a strip of foam behind the interior control panel bezel if you hear the unit rattling at low fan speed — vibration transmitted into the sash frame is a common overnight noise source.
Frequently Asked Questions
Can I use expanding spray foam around a window AC?
No. Expanding foam cures rigid and adheres aggressively, which makes removal at end of season destructive to both the unit and the window frame. It can also exert enough pressure to bow a sash. Stick to compressible closed-cell foam and removable tapes.
Will sealing my unit make it noisier inside?
Almost always the opposite. Air gaps transmit outdoor sound and turbulence noise directly into the room. A well-sealed installation typically sounds quieter and steadier, which is the characteristic that matters most for sleep — consistent broadband sound is far less disruptive than intermittent noise.
Should I leave the unit sealed through winter?
If you can remove and store the unit, do that; it’s better for the appliance and eliminates a large thermal weak point. If it must stay, keep the interior seal intact, add insulated side panels, and fit an exterior cover to block wind driving through the coil.
How often should the foam be replaced?
Inspect every spring. Quality closed-cell foam lasts three to five seasons; adhesive tapes generally need replacing annually, since UV exposure and thermal cycling degrade the bond well before the carrier material fails.
Conclusion
Sealing a window air conditioner properly is unglamorous, inexpensive, and disproportionately effective — it improves comfort, reduces energy use, and removes several of the small environmental disturbances that fragment sleep without ever fully waking you. Diagnose the leaks first, match each material to the gap it’s meant to close, respect the drainage pitch, and check your work every spring. An hour of careful attention buys you a summer of quieter, steadier, cooler nights.